Vinyl Project: The Inception of the Idea
I came up with my Idea for my design almost as soon as I figured out that I was going to put my decal onto my folder, I was sitting at my computer pondering what decal to create and suddenly it hit me, I was going to create a decal of one of my favorite games "Pokemon." Once I decided this I got straight to work drawing my prototype idea and after that I began to create a design in illustrator. My design process and original sketches are below.
My Measurements and Prototypes Drawings.
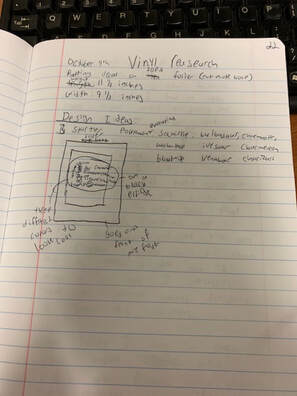
After coming up with my idea I moved into my notebook and got measurements for my Folder that I was going to put my decal on, next I created a basic prototype for what I wanted my design to look like and sketched that out as well, Finally I double checked my measurements and moved into illustrator to start designing.
Designing and finalizing my Idea In Illustrator:
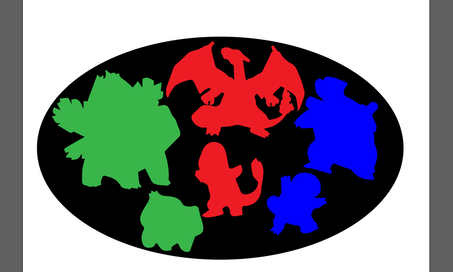
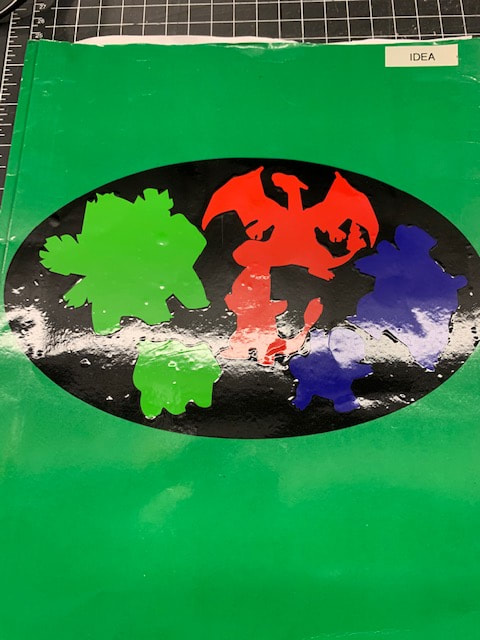
After I had come up with an idea for a decal I went straight to designing it on illustrator. I was going to do the three starter Pokemon and their final evolution's. I had a hard time finding good silhouette images for the designs I wanted, but after looking through hundreds of pictures I had final found 6 perfect silhouette images and I was happy. Once I put the pictures into illustrator I was almost done, but I knew that I was missing one thing, a good background. I added a large black oval background to complement the vibrant reds, blues, and greens, I was going to use when cutting out my decal. And then I was finally finished in illustrator and ready to move on to cutting my decal out.
Using and setting up the Vinyl cutter:
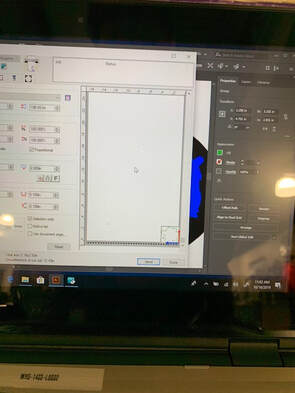
After I finished my design I headed down to the vinyl cutter to begin cutting out my decal. I logged on to the computer and opened up my illustrator file with all of the separate decals that I needed to cut out. I selected the first color I was going to cut, double checked all of the settings, and then I began to cut out my vinyl decal. I cut out all 7 decals and then got ready to paste them onto my folder.
Preparing to Paste on my Vinyl Decal:
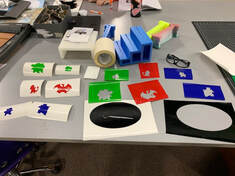
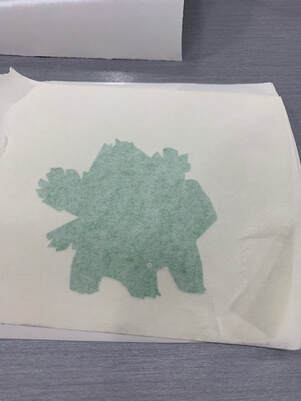
When preparing to paste on your decal the first thing that you need to do is get rid of all of the excess vinyl, this is known as weeding. You will be left with all of the separate pieces of your design and they will be ready to transfer onto transfer tape and they are almost ready to be put onto your folder.
Putting my Vinyl Decal Onto my Folder:
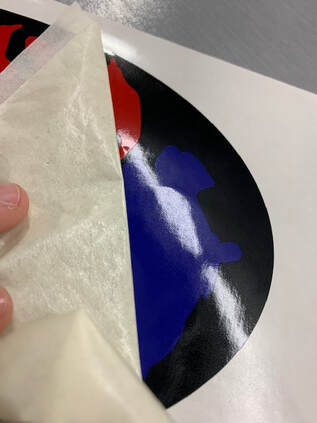
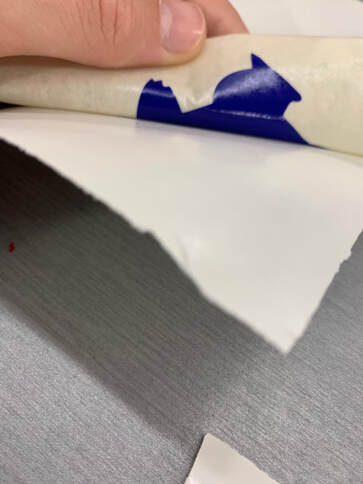
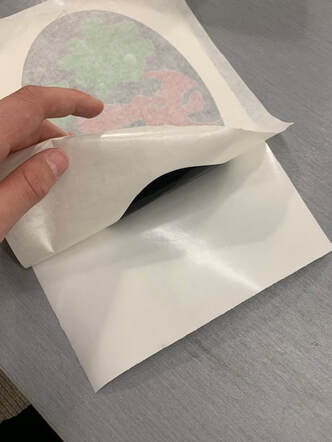
When putting your decal onto your final item the first thing you need to do is transfer all of the separate pieces of your design onto transfer tape. This is so that you can paste the decal down where you want to. After putting all of the pieces onto transfer tape you will want to put them all on top of each other like in the photo to the right so that you are ready to paste your design onto whatever surface you want. After you do that you will want to put that whole thing onto yet another piece of transfer tape. After that is all done, you line up your decal with your surface (in my case a green folder), and then you put the decal down onto the surface and get ready to peel back the tape. But, before you peel off the transfer tape make sure to use a squeegee and push down hard on top of the transfer tape so that your decal is applied smoothly. Then pull back your transfer tape at an angle and voila your vinyl decal is done and applied.
Decal Applying Pictures:
|

|
The Finished Product:
What I Learned:
During the vinyl rotation I learned how to use the vinyl machine and program much more efficiently and I learned how to load and set up the vinyl machine itself. In this rotation I also learned how to design a cool decal with nice contrasting colors and I learned about designing cooler things on illustrator. In addition I learned about how to more efficiently and smoothly transfer my finished decals onto folders and other objects which is important for when I am going to use the vinyl cutter in the future. Overall I learned a lot about the vinyl machine and the vinyl program and I am very excited to use them again in the future.
