My Idea
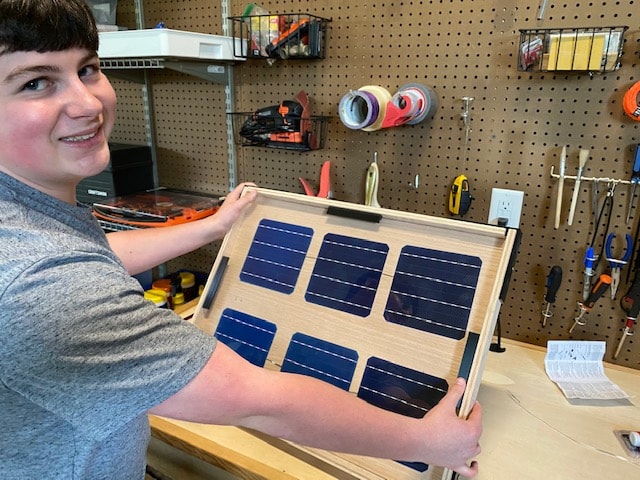
My goal for this semester of big Idea was too design, ad build a working solar panel however, many of my parts didn't arrive because of corona virus and I was only able to get as far as soldering the panels together and finishing my case. We had to use three machines from the innovation center and so I decided to go with the 3-d printer, the vinyl cutter, and the laser. Below are all my sketches and designs for my solar panel.
Using Inventor.
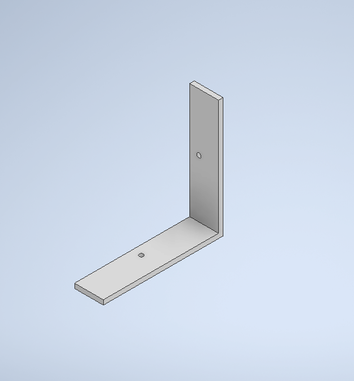
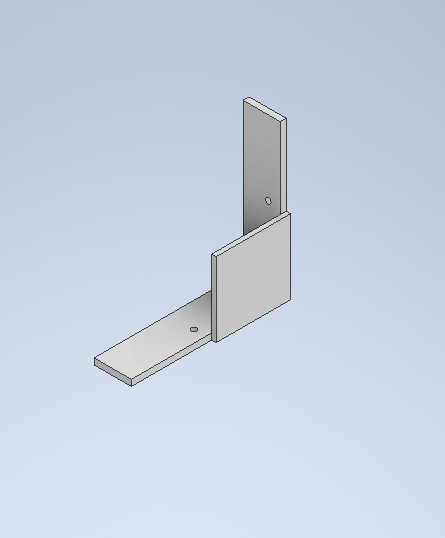
I decided to 3-d print the brackets and shelves that I was going to need for my final project and went through a few trials and designs with each before I ended up with my final project
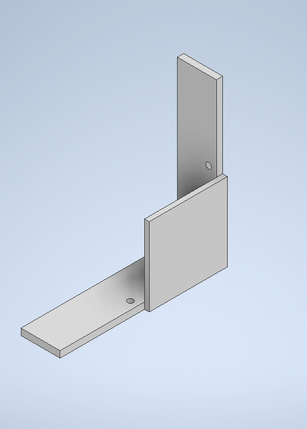
Designing my L brackets
When designing my L brackets I went through much trial and error before getting to my final design, first I tried just a plain old normal L bracket and discovered that it didn't provide the support that I wanted for my case. After that design was complete and I realized it didn't work the way I wanted it to I decided to add a square piece on the bottom of the L bracket to provide the extra support that I wanted, After I printed that design out I learned that the screw holes were a little too high and so I went back into inventor and came up with my final design that is used on my casing. It works well and I think also looks great.
design 1 |
design 2
|
final design |
|
|
|
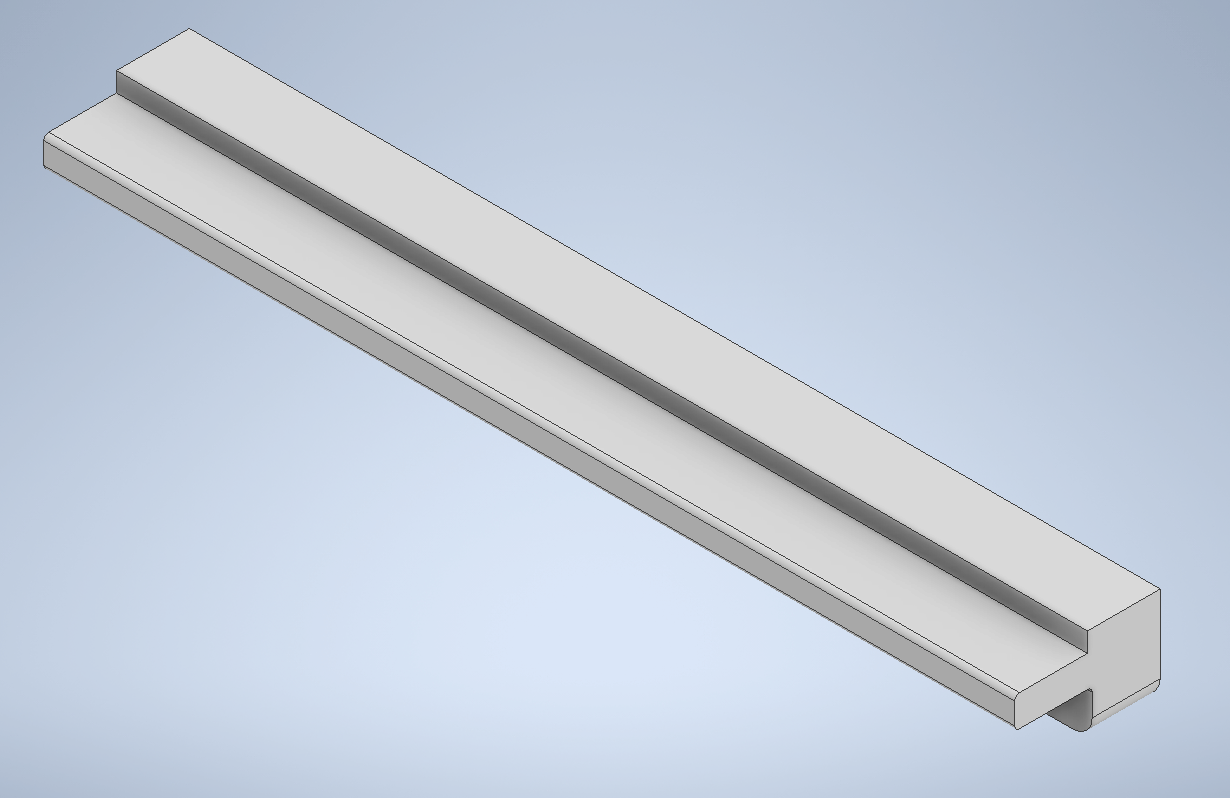
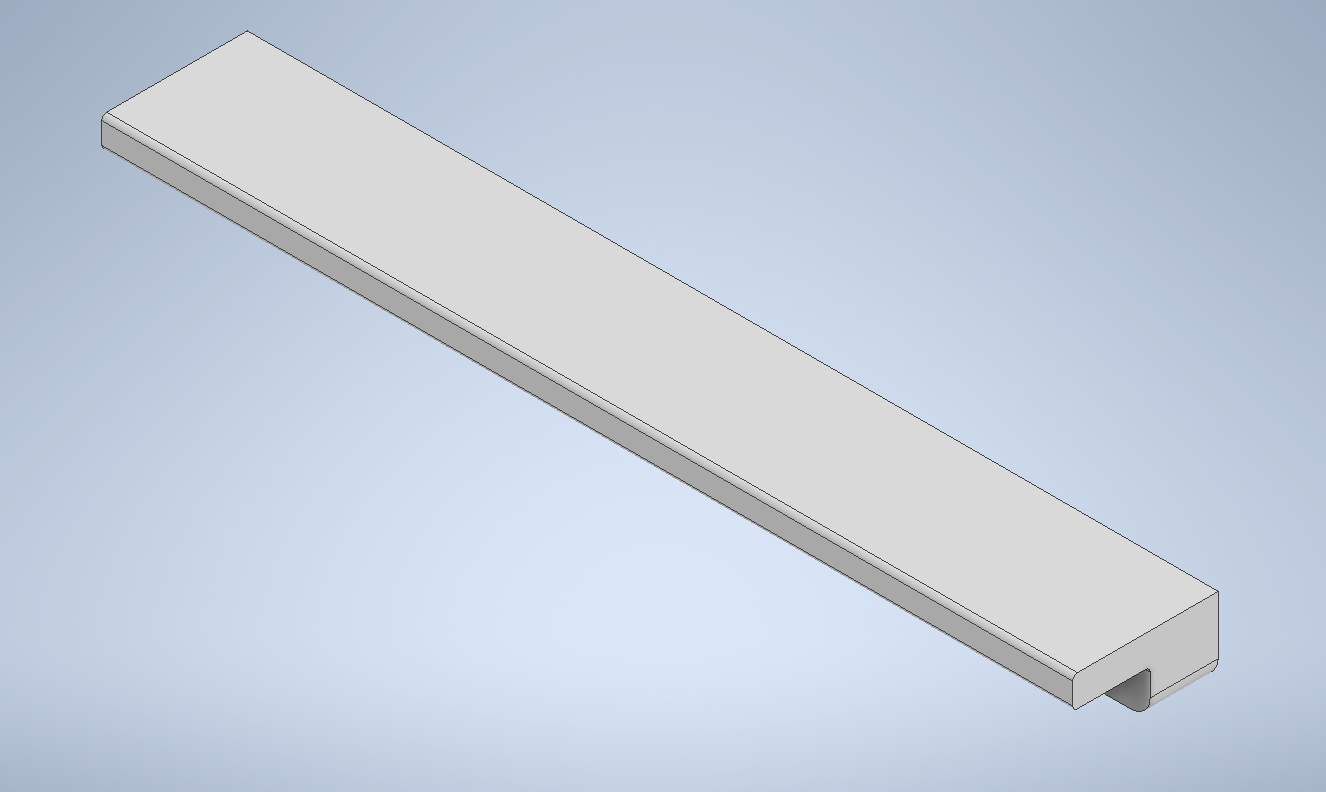
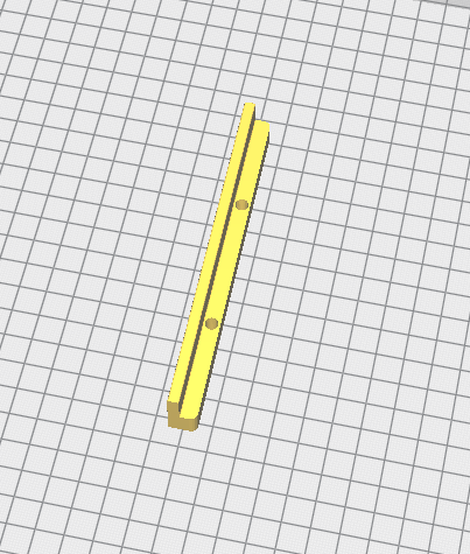
Designing the shelves for my plexiglass
I was planning on attaching a piece of plexiglass to the top of my case so that the panels would be protected form the elements but was struggling to come up with a way to attach it. I ended up going with using 4 shelves that I would glue the plexiglass to so that it would be held firmly and protect the interior of the case much better. I went through two different designs when I was 3-d printing my brackets. The first design had a lip to prevent the shelf from moving too much but when I tested it I realized that the lip had no use and was kind of just looking bad so I went with another design. For my final design I just changed the lip be flush with the height of the other sides and it worked great with how I wanted it to work.
design 1 |
final design |
|
|
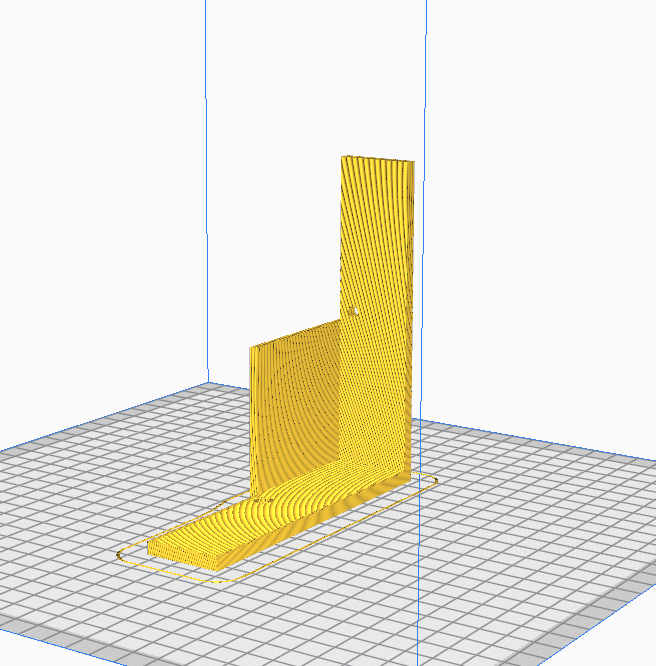
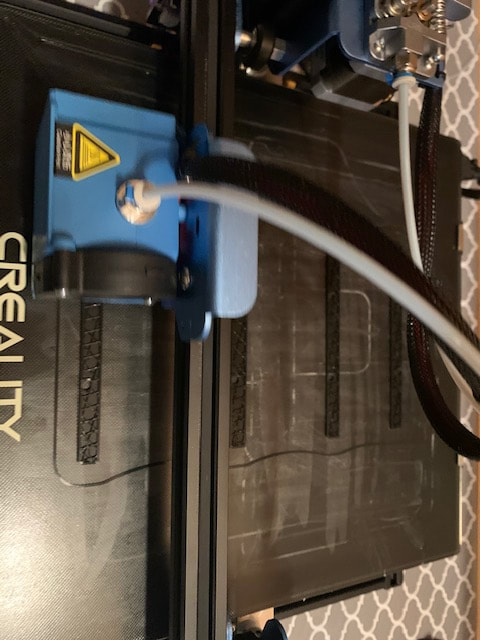
3-D Printing
For my 3-d printer I use a program called cura to change my files into the correct format, to use cura I first exported my files as STls and then changed it to 1000x the size so that it would be correct. after that I previewed my designs and sent them off the the printer. (Unfortunately, I only have a picture of the shelves 3-d printing.)
bracket preview |
shelf preview |
|
|
Shelf printing
Using illustrator
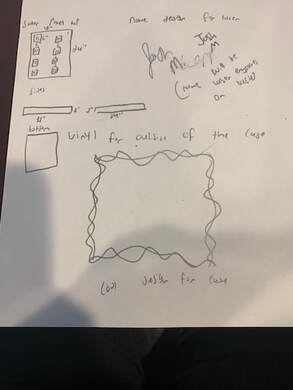
My other two machines were the laser cutter and the vinyl cutter and for those illustrator is the software that you needed to use. I decided that I wanted to laser engrave my name on the back of the case and that I wanted to vinyl cut out some cool decals for the outer rim. Unfortunately I was never able to use the laser or vinyl cutter as a result of the global crisis that was going on throughout this year.
Designing my file for the laser
This part was pretty easy as I just wanted to laser engrave my name. first, I opened up illustrator and made a square that would be engraved around my name to make it look cleaner, after that I just chose a font that I thought looked cool and put it into the square. Lastly I made sure to double check that I left the lines black so that the laser would only engrave.
Laser design

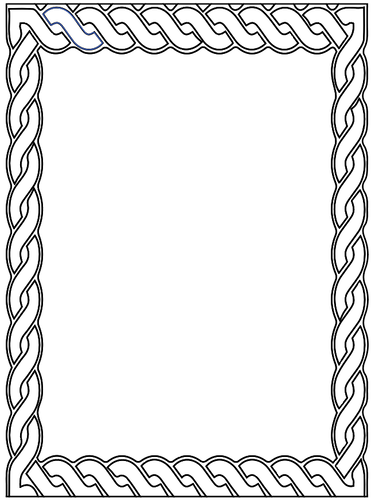
Designing my file for the vinyl cutter
For my vinyl cutter design I decided I wanted to make a cool border that I could put on the outside of my case. First, I found a cool image on the internet and copied it into illustrator. After that I resized it until it was 100% correct and fixed up my settings. Finally I made the line red with a thickness of .0001 so that the vinyl cutter would know to cut it out.
Vinyl design
Putting the parts together
Before we were forced to work from home I got all of my wooden pieces cut out at school. After that we were forced to work at home and I went out and bought a palm sander so I could start to work on my project. The first step was to sand down all of my pieces so that they were ready to put together.
Me sanding
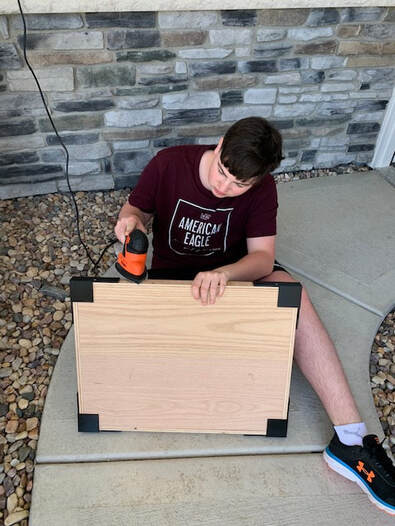
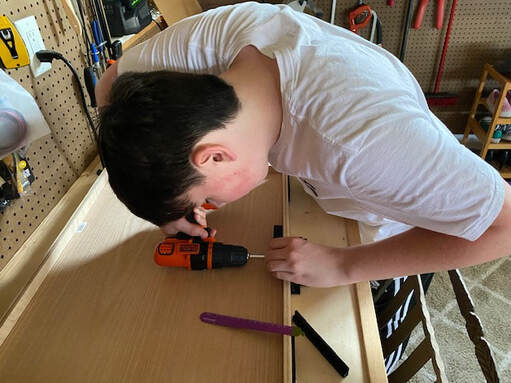
Drilling on the brackets and shelves
The next thing that I did was drill on my L brackets so that the case would stay together. For the brackets I drilled one in each corner and attached the casing pieces together. After I drilled the brackets on I drilled on the shelves, I had to first measure to find out where I wanted to drill it on. After wI finished with the drilling I moved onto the next step.
Me drilling
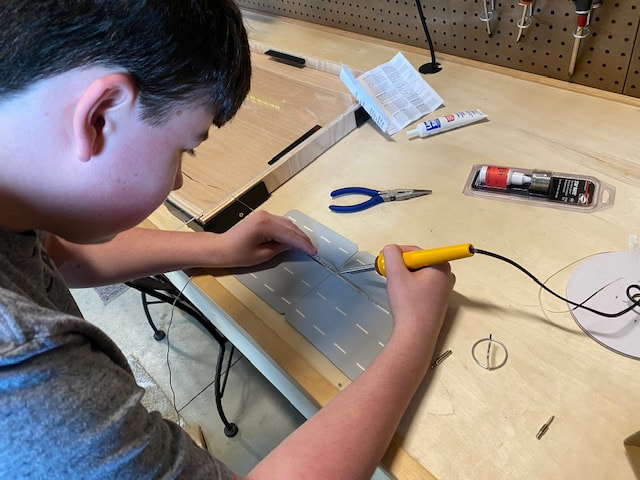
Soldering
After I finished with the drilling I soldered the solar cells together to put into the case. I soldered using solar tabbing wire which helps move the electricity. After I finished with the soldering I moved on to the last thing that I could do during the quarantine which was gluing on my plexiglass.
Me soldering
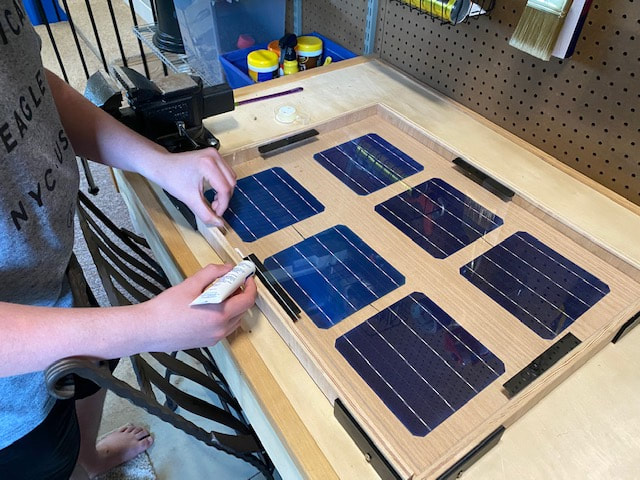
Gluing on the plexiglass
Summary
Throughout this project I learned much first I will talk about that I learned about myself and things that I needed to get better at. I learned that I needed to get better at time management as I underestimated the amount of time that the 3-d prints would take. I also learned that I needed to get better at managing my own time and it was something that I improved on over the course of this semester. I also learned more about being more responsible and self sufficient when working on my own projects, this will be a very useful skill over the course of my entire life.
Now to talk on what I learned while creating this project. I learned much more about how to become better and more efficient when designing with inventor and I learned that many parts will take 2 or more tries to get correct. I also learned more about using inventor and how to become better at using it for multiple different tasks. Finally I learned how to solder and the challenges and precision that I needed to use when soldering things together. Overall this project has taught me much about being a better more responsible person and has helped me learn more about using programs to design and come up with parts of my own. I had a great time working on this but unfortunately not able to finish because many of my components still haven't arrived.
Now to talk on what I learned while creating this project. I learned much more about how to become better and more efficient when designing with inventor and I learned that many parts will take 2 or more tries to get correct. I also learned more about using inventor and how to become better at using it for multiple different tasks. Finally I learned how to solder and the challenges and precision that I needed to use when soldering things together. Overall this project has taught me much about being a better more responsible person and has helped me learn more about using programs to design and come up with parts of my own. I had a great time working on this but unfortunately not able to finish because many of my components still haven't arrived.
The final outcome using what I had.